SCIM Integration with OKTA
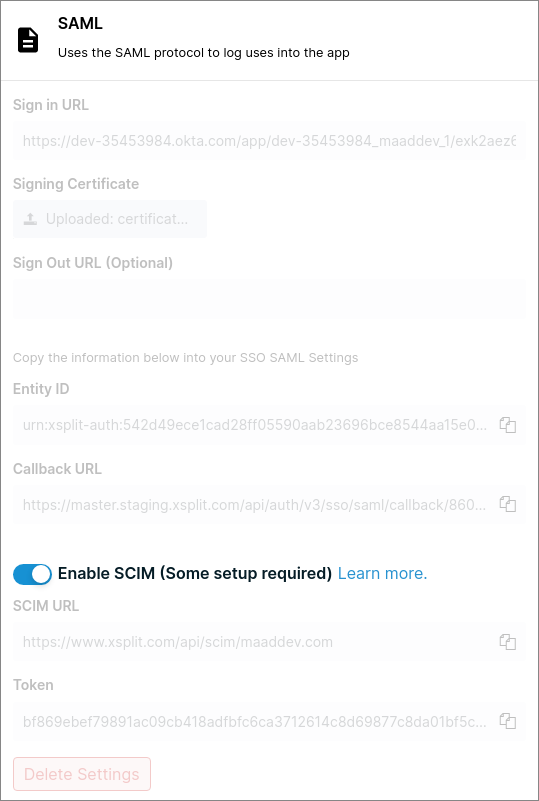
Make sure SCIM is enabled in your XSplit Account's Team License Manager. To do this:
Go to your XSplit Account's Dashboard, then select Authentication under Team.
Select the desired domain
At the bottom of SAML setting make sure SCIM is Enabled.
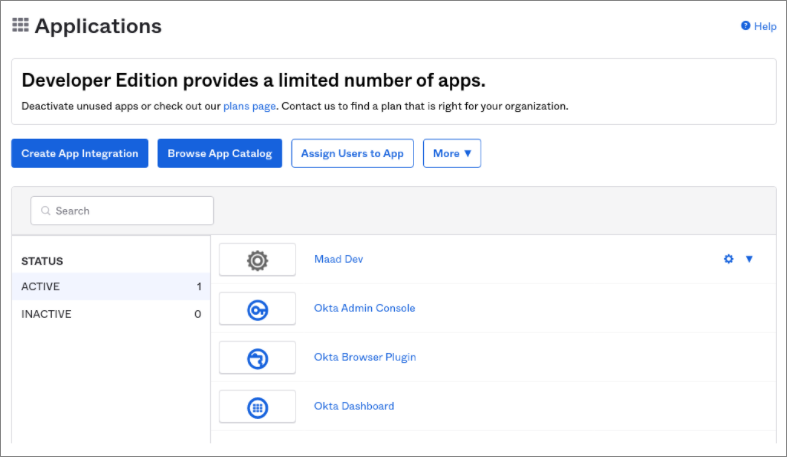
Go to Okta admin portal > Applications, then select your application.
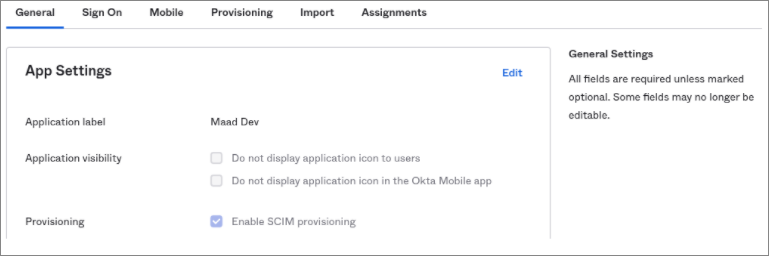
In the General tab, click Edit under App Settings.
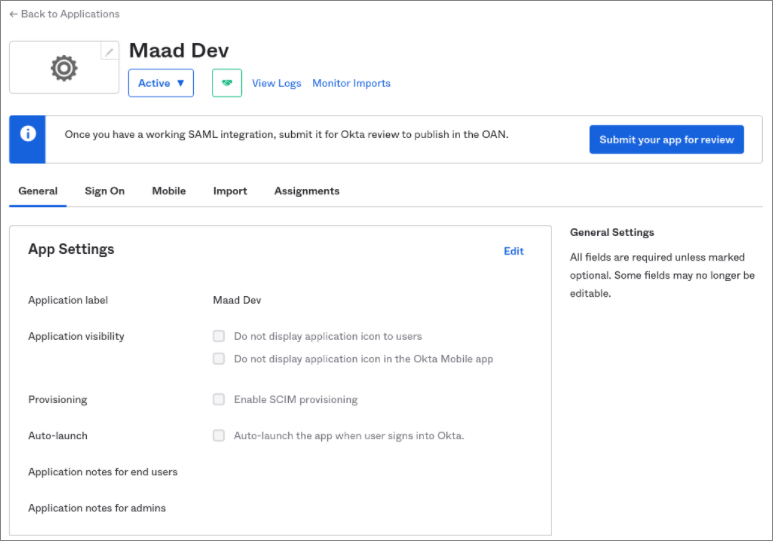
Check Enable SCIM provisioning, then hit the Save button. Doing so will enable and show Provisioning in the menu.
In the Provisioning menu, click Edit. You'll need to grab some information from XSplit so you can input these in Okta.
Tick/Check Push Users and Push Profile Updates
Paste the SCIM URL from XSplit, into the SCIM connector base URL field in Okta.
Put email into Unique identifier field for users field in Okta
For Authentication Mode select HTTP Header
Once done, paste the Token from XSplit into the Authorization field on Okta.
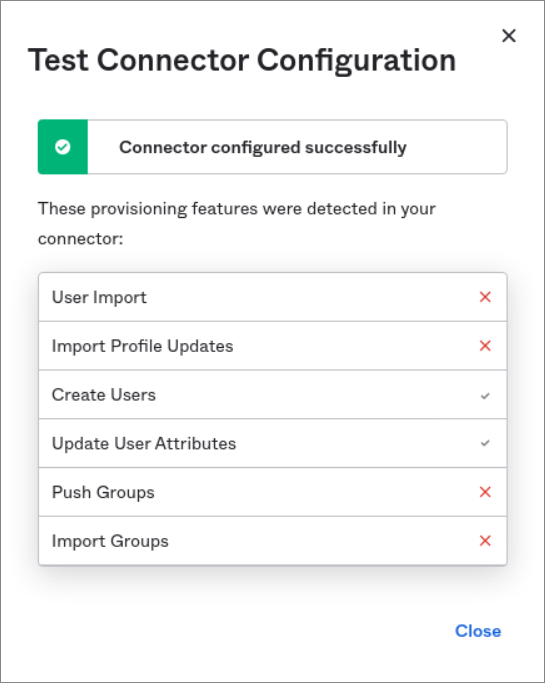
The Test Connector Configuration will confirm if everything is configured successfully. Create Users and Update User Attributes should be checked.
Click save/close afterwards.
After saving, it will display the Provisioning to App configuration. click Edit and check Create User and Deactivate Users.
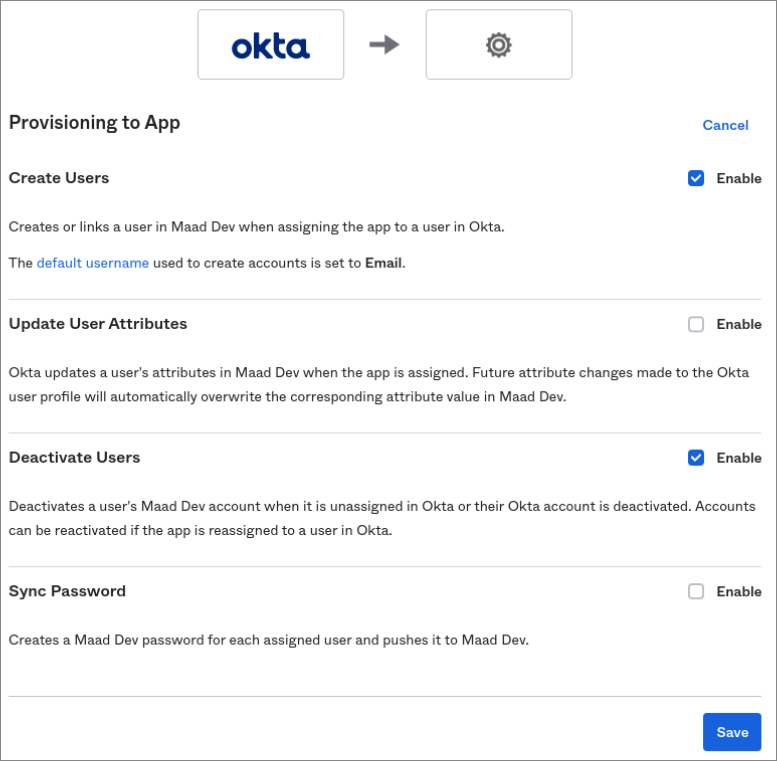
Click Save once done.
Go to your XSplit Account's Dashboard, then select Authentication under Team.
Select the desired domain
At the bottom of SAML setting make sure SCIM is Enabled.
Go to Okta admin portal > Applications, then select your application.
In the General tab, click Edit under App Settings.
Check Enable SCIM provisioning, then hit the Save button. Doing so will enable and show Provisioning in the menu.
In the Provisioning menu, click Edit. You'll need to grab some information from XSplit so you can input these in Okta.
Tick/Check Push Users and Push Profile Updates
Paste the SCIM URL from XSplit, into the SCIM connector base URL field in Okta.
Put email into Unique identifier field for users field in Okta
For Authentication Mode select HTTP Header
Once done, paste the Token from XSplit into the Authorization field on Okta.
The Test Connector Configuration will confirm if everything is configured successfully. Create Users and Update User Attributes should be checked.
Click save/close afterwards.
After saving, it will display the Provisioning to App configuration. click Edit and check Create User and Deactivate Users.
Click Save once done.
Updated on: 12/08/2022
Thank you!